Deploying Django: upload your app to a web host
May 30, 2020 | Categories: tech python django deployment tutorials
This is the second post in Deploying Django, a step-by-step guide to deployment for individuals building personal or small Django web projects. If you are unsure whether the deployment method in this tutorial is suitable for you and you want to understand the options better, the previous page explains what you need to know to make that choice.

© Bulat Silvia | Dreamstime.com
Following the steps in this tutorial, you will safely move your Django app from your personal computer (the “local environment”) to a remote Apache server using git and Github. You'll manage your app files in cPanel, create a virtual environment for your project on the server and install your app's dependencies. Then you'll configure your app settings ready for production. The other pages in this series are:
- Deploying a Django app: what you need to know
- Recreate your MySQL database remotely (optional)
- Register and configure your app for Passenger
- Troubleshoot Django deployment
Once you have completed this tutorial successfully you will have the prerequisites in place to move on to setting up your MySQL database. If you are using Django with SQLite you can skip that step and move straight to registering your app with Passenger.
Prerequisites
This tutorial assumes you successfully created a web app in your local environment using Django. To follow the deployment process outlined here you need an account with a web hosting service that has configured Passenger to serve Python apps. It’s a good idea first to go through the deployment process in these tutorials in the simplest possible way, especially if you are new to coding or to linux. Start with a “bare-bones” Django app rather than a complex, multi-app project. If necessary, create a single one-page view with Django to use as a test project. Once you have successfully deployed your app, you can choose to build it incrementally or go through the deployment process again with a more complex project. Before you begin you'll need the following: 1: A Django project written in Python 3 with an app that you have tested and run successfully in the browser in your local environment. 2: A familiarity with cPanel: know how to log in to your Apache VPS user account using the cPanel interface. Once you have an account with a web hosting service, log in to cPanel and take a look at the interface, in particular the file manager. You can ask for help and advice on the cPanel forums. 5: Basic familiarity with bash and the CLI. You don’t need to be a wizard at it, but you should know how to change directories and install the Python libraries your project uses and, ideally, how to use git. 6: Know how to access your user account on the web server using ssh. Root access to the server is recommended for troubleshooting later on. ssh gives you safe access to your remote server using the command line interface in your local environment. If you have an account on a remote web host but you're not familiar with ssh, you can read here how to connect to the server using ssh. 7: A domain name that points to your web server by its IP address. 8: A GitHub account.
Uploading your Django project to the remote server
In this step, using Github and git, you will put your Django project, minus secret settings, onto the server. You’ll create a virtual environment for your project and install all its dependencies. Then you will configure your settings for the production environment. Keeping secret keys separate from your app code in production is good practice in case bad guys find a way to view your source code in the browser. They can then try to reverse engineer your code and hack your server. Push your Django project, minus secrets and settings, to a Github repository. You don't need to include your virtual environment or any hidden directories (such as git or vscode) that were created for your Django project. For a simple Django project, all you will transfer are your project directory, your apps and your manage.py file. Even if your Github repo is private, at least remove and save the SECRET_KEY variable assignment from settings.py before pushing your files to Github. Ideally, remove all passwords from your code and do not include your settings.py file. Keep your passwords and secret keys safe locally. Later you will create a new productionsettings.py file and a secrets.json file for your project on the server, storing your secrets separately from your app code. Your cPanel home directory has sub-directories such as public_html, public_ftp and mail:
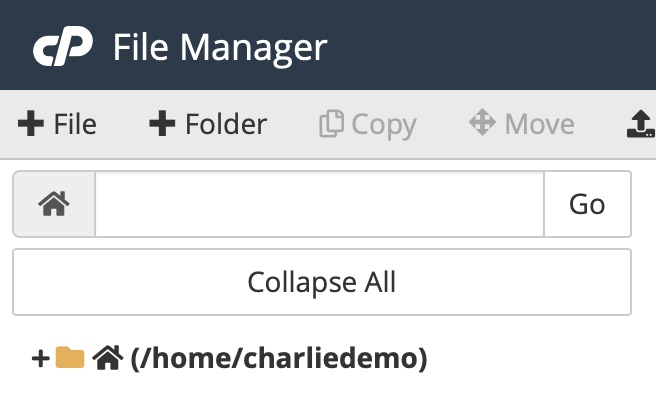
Alternately, you can see your home directory with ssh using ls -l Next, you will load your Django project from Github to the top level in your home directory alongside these other directories, using ssh from your terminal. The steps below guide you through cloning your Django project onto the production server from a Github repo via ssh. Alternatively, you could use the cPanel git app if your web host installed it, or transfer your files with FTP. In your terminal, log in to the server using ssh. The command you use to log in will be something like this: $ ssh myuseraccount@server.myservername.com Occasionally, some hosts require the port number too: $ ssh myuseraccount@server.myservername.com -p#### In this case, replace the four hash signs following -p with your server’s ssh port number. You will be asked for your account password. Once you are connected to your user account on the server, your terminal prompt will look something like this: [charliedemo@server ~]$ Next, git clone your project, minus secrets and passwords, from Github to the server. Using $ ls -l you should see your Django project in your home directory. Change directory to your Django project: $ cd mydjangoprojectname Create a virtual environment for your project on the server with the following command (or using your preferred package): $ python3 -m venv env This guide assumes you wrote your app in Python 3. Later you will configure Passenger wsgi to serve your app using Python 3. If your app is in Python 2, set up your virtual environment as you would normally. Later, when configuring the passenger wsgi interface, you should make sure to customize it according to the Python version you are using in your virtual environment. Activate your virtual environment. If you created your virtual environment as above, use the following command: $ source env/bin/activate Your terminal prompt now shows you are working from inside your virtual environment, with (env) or similar alongside your current working directory name. Next, from inside your virtual environment install all your project dependencies, just as you would if you were working in your local environment. You may need to install pip first if your hosting service has not done so already. Don’t forget to install Django! $ pip3 install Django In the next step you will write a .json file to store your secret key and you'll configure your project settings for the production environment.
Configure secrets and settings for your production environment
A general principle when working with separate development and production environments is to write and test new features locally first and then deploy them once you are confident the new code works. If you work this way, the only difference between your local project and your deployed project will be the settings configuration and, in some cases, where you keep your static files and the code you use to access and load them.
In this tutorial you'll create a separate file for production settings. Larger projects have multiple settings files, one for each environment closer to production, all of which inherit from a base file. Once you have a production environment you're happy and familiar with, you could go on to change your settings file structure and make a test environment on the server.
Working locally, create a secrets.json file inside your configuration app (that is the Django directory where you keep your settings.py file).
Write the following code into secrets.json:
{
"FILENAME": "secrets.json",
"SECRET_KEY": "my*$long%!*secret%!*key*#goes!!here",
"DATABASES_HOST": "127.0.0.1",
"PORT": "8889"
}
Your secret key is unique. When you built your Django project locally, a secret key was assigned automatically to a variable in settings.py, a file created automatically by the Django startproject process. You should find your secret key in that file unless you changed its location.
The DATABASES_HOST variable is set to the familiar local IP address 127.0.0.1. When you move the production settings file to your deployed project, this local IP address tells Django where to look – that is, local to the production environment – for your database server. The MySQL port is often 8889, but you should check the port number your production server uses to connect to your database (this can be set differently per-VPS in WHM).
Save secrets.json locally.
Copy your local settings.py file and rename the new file productionsettings.py
Remove the SECRET_KEY variable.
Add the following to your imports at the top of productionsettings.py:
import json
from django.core.exceptions import ImproperlyConfigured
Normally you should not import any classes or methods from Django directly into your settings file, but ImproperlyConfigured is an exception to this rule. It’s an empty class inheriting from Python’s base exception class. You will use it later to set an error message. If it is triggered, your code will continue to run so that you will see the error message.
At the end of productionsettings.py add the following code:
# Gets secret key from secrets module
with open('configappname/secrets.json') as f:
    secrets = json.loads(f.read())

def get_secret(setting, secrets=secrets):
    '''Get the secret variable or return explicit exception'''
    try:
        return secrets[setting]
    except KeyError:
        error_msg = 'Set the {0} environment.variable'.format(setting)
    raise ImproperlyConfigured(error_msg)

SECRET_KEY = get_secret('SECRET_KEY')
The first line opens your secrets.json file. The open function has to know where to find your settings file: the string argument passed to it is the path from ‘where we are now’ to the .json file. configappname is the name of the directory where you keep your settings files.
The try clause in get_secret returns any given variable (‘setting’) from your secrets.json file.
Next, still in productionsettings.py, add the following variables:
# Ensures that requests over HTTP are redirected to HTTPS
SECURE_SSL_REDIRECT = True

# Tells browser to only send cookies over HTTPS
SESSION_COOKIE_SECURE = True

# Prevents cross site request forgery attacks
CSRF_COOKIE_SECURE = True
[Maybe link here to explanations about each of those variables?]
To the ALLOWED_HOSTS variable, add your hosting service IP address, your domain name and '127.0.0.1' which is your hosting service's local IP address needed to access the database. They should be strings, for example:
ALLOWED_HOSTS = ['67.20.55.28', 'charliedemo.com', '127.0.0.1',]
Save productionsettings.py locally.
Upload secrets.json and productionsettings.py to your Django project root directory (or your configuration app if it is separate) directly to the server. You can use git to do this, or add them manually into your project using the file manager in cPanel. Don't keep them in your git repo.
Next, as you changed the name of your settings file to productionsettings.py, you must ensure that the path to your settings in manage.py is updated. Inside the main function in manage.py in your Django project in cPanel, change the second argument to os.environ.setdefault from ‘myappname.settings’ to ‘myappname.productionsettings’:
import os
import sys

def main():
    os.environ.setdefault('DJANGO_SETTINGS_MODULE', 'demo.productionsettings')
try:
    ….etc.
From here on, remember always to use your local settings for testing locally and your production settings in production. Local settings make debugging much easier but they are dangerous in deployment.
You've now safely loaded your Django project to the server and you're ready to set up your database (optional) and register and configure your app with Passenger. The next page of the tutorial helps you set up and configure your data so that your app can access it securely from the production server.
*** Could you follow this tutorial? How could it be better? I'm grateful for suggestions, please DM me @_awbery_on Twitter with feedback. Thank you!